I recently unearthed my grandmother’s old gardening shed, a treasure trove of forgotten tools. Rust-covered trowels, a wooden-handled hoe, and a watering can with a delightful patina – all remnants of a time when craftsmanship and durability reigned supreme. These weren’t just tools; they were stories, whispering tales of sun-drenched days and bountiful harvests. I was fascinated. The experience sparked a deep appreciation for vintage gardening tools. This post will show you how to identify, appreciate, and even use these classic tools. You’ll gain a deeper understanding of gardening history and learn how these vintage gardening tools can enhance your own garden. You’ll discover the unique charm of these tools, and find inspiration to bring them back to life in your own space.
Key Takeaways
- You will discover how to identify authentic vintage gardening tools.
- You will learn about the materials and construction methods of older tools.
- You’ll gain insight into the history and evolution of garden tools.
- You’ll learn how to properly care for and maintain vintage gardening tools.
- You will explore the unique aesthetic and practical advantages of these tools.
- You will receive guidance on where to find and how to collect vintage gardening tools.
Unearthing the Past: Identifying Authentic Vintage Tools
The allure of a classic tool lies not just in its functionality, but also in its history. Recognizing an authentic vintage tool can be a rewarding experience. It’s like holding a piece of the past in your hands. This means carefully examining the tool’s construction, materials, and any markings it might have. Understanding these details will help separate a genuine antique from a newer imitation. The goal is to see a tool that has its own unique story.
Material Matters: The Language of the Past
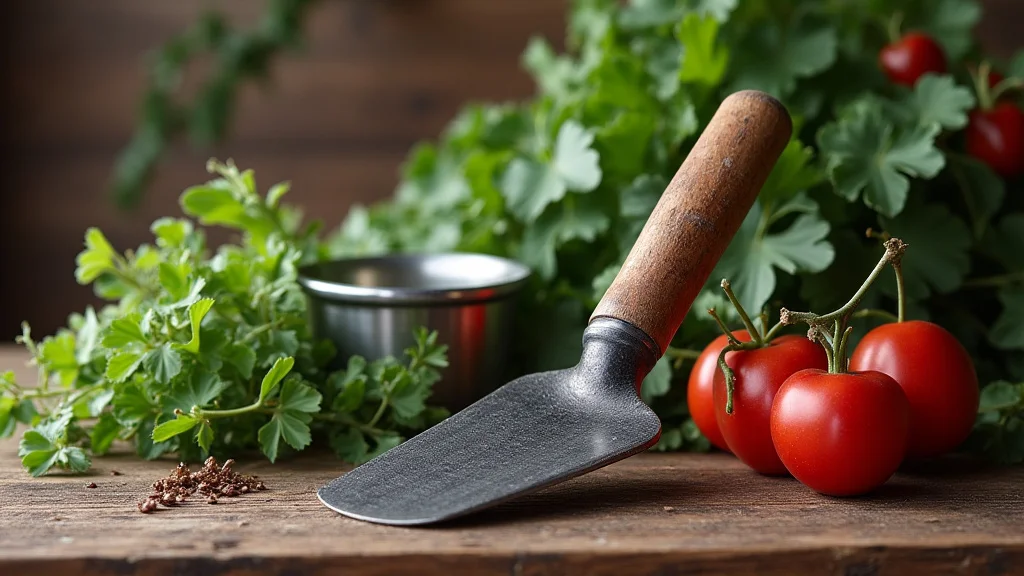
The materials used in crafting vintage gardening tools provide crucial clues to their age and authenticity. Before mass production, toolmakers relied on high-quality materials such as wood, iron, and steel. Examining these materials closely will reveal secrets about the tool’s age. The kind of wood used for handles, for instance, can pinpoint a tool’s era. Similarly, the method by which metal parts are joined – whether by rivets, welding, or casting – offers valuable insights. Spotting the differences in how the materials were worked is key.
- Wood: Handles were commonly crafted from hardwoods like ash, hickory, and oak. These woods are known for their strength and durability. The presence of these types of wood is a positive sign.
- Iron and Steel: The metal components of vintage tools are made from iron and steel. Early tools often employed hand-forged iron. This is identified by its rougher texture and slight imperfections. Later, steel was more common, offering greater strength and durability.
- Fasteners and Joining Methods: The way a tool is put together provides hints about its age. Early tools often used rivets to join metal parts, creating a secure hold that would last for years.
Hickory and ash were excellent for absorbing shock, making them suitable for tools subject to impact, such as axes and mauls. Look for handles with a smooth, worn finish that matches the age of the tool. If the wood appears to be too perfect or feels lightweight, it might be a replacement or a modern reproduction. Original handles might also feature maker’s marks, which can assist in dating the tool.
The quality of the steel will vary depending on the tool’s era and intended use. Hand-forged iron, while sometimes showing signs of rust, often displays a character that is difficult to replicate. Examine the surface closely for signs of pitting or hand-hammering. Look for maker’s marks or stamps on the metal. These stamps can provide crucial information about the tool’s manufacturer and likely production date.
Welding techniques evolved over time, and the type of weld can also help pinpoint a tool’s era. Early welds may appear less refined than those seen on modern tools. The absence of modern fasteners like screws, or the presence of hand-made rivets, suggests an older tool.
Decoding the Details: Maker’s Marks and Stamps
One of the best ways to verify a vintage gardening tool’s authenticity is by looking for maker’s marks and stamps. These markings are like the tool’s signature, revealing its origin and age. They often identify the manufacturer and sometimes include the tool’s model or even its manufacturing date. These marks can be found on various parts of the tool, from the handle to the blade. Learning how to read and interpret these marks is key to understanding the history of your tools.
- Location: The location of maker’s marks varies. On shovels and spades, you might find stamps on the blade near the handle connection. On hoes and rakes, they are usually present on the metal head or along the handle.
- Types of Marks: Many different types of markings were used. Common stamps include the manufacturer’s name, their logo or emblem, the tool’s model number, and sometimes even the year of production.
- Research and Verification: Once you find maker’s marks, start your research. Many online databases, auction records, and collector forums provide information about tool manufacturers and their marks.
The type of mark also varies. Some are stamped directly into the metal, while others might be on a paper label. Look closely for any indentations, raised lettering, or remaining pieces of labels. Researching the tool’s likely place of origin is essential. For instance, tools from England might have the crown symbol, indicating the country of origin.
Sometimes, tools bear a registered trademark, which helps narrow down the manufacturer. A tool with a registered design number would provide even more information. Study catalogs and online resources to find information about manufacturers from the specific era. Websites, books, and online databases can assist you in verifying the maker’s marks on the tool and establishing its authenticity.
Compare the markings on your tool with examples from the research materials. Websites dedicated to tool collecting frequently offer valuable information. Comparing the style of the stamp, the font used, and the overall design will help determine the tool’s authenticity. Collector communities are a great source of information. Sharing photos of your tool and its markings can lead to assistance from other enthusiasts.
A Look Back: The History of Garden Tools
The history of garden tools is a story of human ingenuity, innovation, and a lasting connection to the land. From the simple tools of ancient civilizations to the refined implements of the Victorian era, the tools have reflected changes in farming techniques, social customs, and technological progress. Examining the history of these tools is a fascinating glimpse into the past.
From Ancient Origins to the Middle Ages
The earliest gardening tools were simple, reflecting the essential needs of early agriculture. The tools were created to plant and harvest crops. The earliest tools were made with materials readily available. They also reflected the technology of their time. These tools were often basic. They were designed to perform essential tasks like preparing the soil, planting seeds, and harvesting crops. Examining these primitive tools offers insights into the origins of gardening.
- Early Tools and Materials: Early gardening tools were often fashioned from wood, bone, stone, and later, copper and bronze. Wooden digging sticks, shaped to loosen the soil, were among the earliest tools.
- Egyptian and Roman Influences: Ancient Egypt and Rome made significant contributions to the development of gardening tools. Egyptian farmers used hoes with wooden handles to till the soil.
- The Medieval Era: During the Middle Ages, gardening was largely centered on sustenance and the production of food. Tools remained simple, with a focus on basic needs.
Flint blades were crafted for cutting and harvesting. As civilizations advanced, tools became more specialized and efficient. Bronze and copper tools were sharper. They could be crafted in various shapes. These improvements increased the efficiency of agricultural tasks.
The Romans, famous for their agricultural practices, introduced improved plows, spades, and rakes. They also devised early irrigation systems. Roman tools were often made of iron. Iron tools were stronger and could be used for a wider range of tasks. These innovations helped to increase productivity.
The hand hoe, spade, and sickle remained essential for farming. Technological progress was slow, but the emphasis was on practical, durable tools that could be relied upon. The focus was on producing enough food for survival.
The Renaissance and the Rise of Specialized Tools
The Renaissance marked a period of renewed interest in the arts, sciences, and the natural world. This era saw an increased focus on the cultivation of gardens for both practical and aesthetic purposes. The Renaissance era saw a shift from tools for basic survival to ones that could make gardening more pleasurable. Tools were designed not only for farming, but also for the creation of beautiful and functional gardens.
- New Innovations: The Renaissance saw a rise in new tools, driven by the desire for improved gardening techniques. The invention of the wheelbarrow made transporting materials easier.
- Gardening for Beauty and Utility: Gardens became spaces for growing both food and ornamental plants. This shift influenced the design of gardening tools.
- Influence of the Printing Press: The printing press contributed to the spread of gardening knowledge. Gardening manuals and books began to circulate, offering instructions on tool usage, plant care, and garden design.
The introduction of new metals and casting methods allowed for the creation of more complex tools. Tools started to become more specialized to address particular gardening tasks.
The development of more refined tools, such as pruning shears and secateurs, allowed for meticulous plant care and shaping. Innovations included tools for planting, weeding, and pruning. These tools enabled gardeners to create formal gardens and complex designs.
These manuals often included illustrations of tools, helping gardeners to better understand and use them. This exchange of knowledge facilitated improvements in gardening practices.
The Victorian Era and the Industrial Revolution
The Victorian era witnessed major changes in the design and production of gardening tools. The Industrial Revolution brought about mass production, new materials, and a wider range of tools to suit different gardening needs. Tools became more accessible, leading to a rise in gardening as a popular hobby for all classes. Victorian gardening was a symbol of leisure, wealth, and a connection to the natural world. This was reflected in the design of the tools.
- Mass Production: The Industrial Revolution and mass production methods transformed tool manufacturing. Tools were no longer made by hand, but created in factories.
- Design and Style: Victorian gardening tools often featured elaborate designs and decorations. Tool manufacturers focused on both function and appearance.
- Gardening as a Social Activity: The Victorian era saw a rise in gardening clubs and competitions. These events fostered the exchange of information and techniques.
This led to increased efficiency and lower costs. New materials, such as cast iron and steel, provided stronger and more durable tools. Tools became more affordable, allowing gardening to become accessible to a larger part of the population.
Handles were often made of wood. The tools featured ornate patterns. The tools represented status and reflected the Victorian love of beauty and order. Tools were designed to be both aesthetically pleasing and functional.
Gardening became a popular pastime, transcending social boundaries. Garden tools evolved to meet the demands of this increasingly social activity. Tools were crafted for every imaginable gardening task, from lawn care to elaborate flower arrangements.
Restoring and Maintaining Your Vintage Gardening Tools
Restoring vintage gardening tools is more than just a restoration process. It’s about bringing back to life a piece of history. The process requires patience, care, and attention to detail. Proper restoration not only enhances the tool’s appearance, but also ensures it’s safe and effective for use. Restoring these tools is an art. It takes an appreciation for both functionality and aesthetic beauty.
Assessment and Preparation
Before beginning the restoration process, it is important to assess the tool’s condition. Evaluate the level of rust, damage, and wear. The goal is to determine the best approach for restoration. Identify the materials the tool is made from to pick the best cleaning methods. Safety comes first when handling the tools. Gather protective gear, like gloves and safety glasses. This assessment helps to inform the process.
- Condition Assessment: Check the tool for rust, damage, and wear. Note the extent of the rust, whether it’s surface rust or has deeply penetrated.
- Material Identification: Determine the types of materials the tool is made of. The cleaning techniques will depend on the material.
- Safety First: Put on gloves, safety glasses, and a dust mask. This is vital when working with rust or cleaning solutions.
Examine wooden handles for cracks, splits, or rot. Carefully inspect the metal components for bends or other issues. Document any broken parts that need to be replaced. This information will help determine the restoration.
This includes metal, wood, and any paints or finishes. Using the right cleaning agents and methods is essential. This is crucial to avoid damaging the tool.
Work in a well-ventilated location to prevent exposure to fumes. If the tool is very old, it may have lead-based paint. Protect yourself and others.
Cleaning and Rust Removal
Cleaning and rust removal are essential steps. These steps restore the metal components of vintage tools. The aim is to remove rust and dirt without damaging the original metal. There are different methods, each tailored to the type and severity of the rust. Cleaning the tool is a way to prepare it for further restoration.
- Mechanical Methods: Use wire brushes, steel wool, or abrasive pads to remove surface rust. These tools work well for tools with moderate rust.
- Chemical Methods: For more severe rust, chemical rust removers are effective. These solutions convert rust into a more stable substance.
- Electrolytic Rust Removal: This method involves an electrochemical process. It is used to remove rust by submerging the tool in a solution.
Work with care, avoiding excessive pressure to prevent scratching or damaging the metal. Abrasive methods work best on more stubborn rust spots.
Follow the manufacturer’s instructions, using protective gloves and eye protection. Chemical treatments often require soaking the tool in the solution. This is followed by rinsing and drying to prevent future corrosion.
This process is more involved, but it is very effective for removing deep rust. This is a good option when the goal is a complete rust removal. The result is a rust-free surface.
Handle Restoration and Wood Treatment
Restoring the handles of vintage tools is an important part of the process. Handles can provide clues about the age of the tools. Wood handles are often weathered. They can be cracked or damaged. Handle restoration includes cleaning, repairing, and protecting the wood. It also maintains the aesthetic appearance of the tool.
- Cleaning the Wood: Use a mild soap and water solution to clean the wooden handles. Remove dirt, grime, and old finishes.
- Repairing Damage: Repair any cracks or splits in the wood. Use wood glue and clamps to securely bind the wood together.
- Finishing and Protection: After cleaning and repairs, apply a protective finish to the wood. Oil-based finishes provide protection against moisture and wear.
A soft brush can remove dirt from crevices. Allow the wood to dry completely before any further treatment.
When the handle is beyond repair, you may need to replace it. A good quality wood handle can be found from a specialty supplier.
Linseed oil or tung oil can also be applied. Allow the finish to dry completely. This keeps the handle strong for the long-term.
Collecting and Displaying Vintage Gardening Tools
Collecting vintage gardening tools is an enjoyable hobby. It combines historical interest, the thrill of the hunt, and the opportunity to own beautiful and functional artifacts. Whether you’re a seasoned collector or just starting out, building a collection is an adventure. It provides a way to explore the past and appreciate the craftsmanship of a bygone era.
Finding Your Treasures: Where to Look
The journey to find vintage gardening tools starts with finding the right places. Local antique shops, flea markets, and online marketplaces offer a wide selection of tools. Each place presents its own unique finds and potential challenges. Knowing where to look increases your chances of finding valuable pieces.
- Antique Shops and Flea Markets: Antique shops are a great starting point for finding vintage gardening tools. These shops offer curated collections, and the staff often have knowledge.
- Online Marketplaces: The Internet offers a vast network of online marketplaces. Online marketplaces allow you to search for specific tools.
- Auctions and Estate Sales: Auctions and estate sales are also excellent places to find vintage gardening tools. These sales often include rare and valuable pieces.
Flea markets are an exciting place to look. Flea markets can be a good source of affordable tools, but you need to do your research. Being able to recognize original maker’s marks is helpful.
Websites often have detailed descriptions and photos. You can easily compare prices and features. Be cautious and always verify the seller’s reputation before making a purchase.
Research tools and values before bidding. Researching these items will help you make a good bid. Participating in auctions is a fun way to grow your collection.
Displaying Your Collection: Showcasing the Past
Displaying your vintage gardening tool collection is an exciting part of the hobby. Displaying the tools shows the beauty of craftsmanship. There are several creative display options. Finding the ideal display showcases your collection and keeps the tools safe. Displaying the tools showcases your appreciation of the history and craftsmanship.
- Wall Displays: Using walls to showcase the tools is an easy display option. Install hooks or brackets to hang tools individually or as a group.
- Shelves and Cabinets: Shelves and cabinets provide an excellent way to display your collection. Use open shelves for easy access and viewing.
- Themed Displays: Create displays that highlight a specific period or type of gardening. Display tools alongside related items, like old seed packets or garden books.
Arrange tools by type, era, or manufacturer. Use a contrasting background color to make the tools stand out.
Cabinets offer a more enclosed storage solution, protecting tools from dust and damage. Group tools by type, era, or theme. Add lighting to highlight your prized tools.
Use vintage photographs or paintings to set the atmosphere. Group tools by era or specific use.
Frequently Asked Questions
Question: How can I tell if a tool is truly vintage and not a reproduction?
Answer: Carefully examine the tool for maker’s marks, the quality of materials, and the construction methods used. Look for signs of wear and tear consistent with the age of the tool. Research the maker’s marks, and compare the tool with known examples of vintage tools.
Question: What are the best ways to remove rust from vintage gardening tools?
Answer: For light rust, use a wire brush or steel wool. For more serious rust, consider chemical rust removers or electrolytic rust removal. Always follow safety precautions, and assess the severity of the rust to select the appropriate method.
Question: What materials should I use to protect the wooden handles of my tools?
Answer: Linseed oil, tung oil, or a similar oil-based finish is suitable. This can protect the wood from moisture and wear. Apply several coats, allowing each to dry completely, to ensure good protection.
Question: Where can I find original replacement parts for vintage tools?
Answer: Check with antique tool suppliers, online auction sites, and collector communities. You may also find vintage parts at flea markets and estate sales. Sometimes, you may need to have parts fabricated by a specialist.
Question: How do I store my vintage gardening tools to prevent damage?
Answer: Store tools in a dry, well-ventilated area. Protect them from direct sunlight and extreme temperatures. Apply a protective coating of oil to the metal parts to prevent rust. Consider hanging the tools on a wall or storing them in a cabinet to prevent damage.
Final Thoughts
Vintage gardening tools offer a captivating blend of beauty, practicality, and history. From the simple elegance of a hand-forged trowel to the sturdy reliability of a Victorian spade, these tools are more than just implements. They’re tangible links to the past, reminding us of the human connection to the land. We have seen how to identify, restore, and care for these classic tools. You’ve uncovered the allure of their construction, and learned how to bring them back to life. You’ve also discovered ways to display these tools. Whether you’re a seasoned gardener, a history buff, or someone with a love for handcrafted items, collecting and using these tools can enrich your gardening experience. Don’t let these treasures gather dust. Embrace the past, celebrate the craft, and let your garden tell its own story.