Remember that time you tried to plant a stubborn flower, but your trowel just bounced off the hard-packed earth? Frustrating, right? It’s a common problem for gardeners. Soil compaction can prevent plants from getting the air, water, and nutrients they need. This post will explore the gardening tools to loosen soil that can transform your backyard from a struggling space into a thriving oasis. You’ll learn which tools are best for different tasks, improving your garden’s health and boosting your overall gardening success. Prepare to discover the secrets of creating the perfect planting environment and enjoy a more bountiful harvest. You will also discover the types of soil that you may have in your yard, and how to improve it.
Key Takeaways
- Different types of gardening tools to loosen soil cater to specific needs and soil conditions.
- Choosing the right tool can dramatically improve soil aeration and drainage.
- Knowing how to use these tools effectively protects plant roots.
- Regular soil loosening promotes healthy root growth.
- Soil type significantly impacts the tool selection process.
- Proper soil care enhances plant yields and overall garden vitality.
Unlocking the Power of Loosened Soil
The foundation of a thriving garden lies beneath our feet: the soil. It’s more than just dirt; it’s a living ecosystem teeming with life. For plants to flourish, this ecosystem must be healthy, and that starts with loose, well-aerated soil. Soil compaction, caused by foot traffic, heavy rainfall, or poor soil structure, squeezes out the air and water that roots need to survive. This section will uncover the reasons to loosen soil, ensuring your plants receive the vital resources they need to thrive. Explore the advantages of well-prepared beds.
The Benefits of Loosening Soil
Loosening soil provides several key benefits that contribute to plant health and productivity. When the soil is loose, water can penetrate more easily, reaching the roots where it’s needed. This improved drainage prevents waterlogging, which can lead to root rot. Air pockets are created, allowing for better oxygen flow to the roots. Nutrients become more accessible, as the roots can explore a wider area for nourishment. Loose soil promotes root growth, and healthy roots translate into healthier, more vigorous plants. The result is a vibrant, productive garden that rewards your efforts with beautiful blooms and abundant harvests.
- Improved Drainage: Loose soil allows water to drain effectively, preventing root rot.
- Enhanced Aeration: Soil aeration ensures sufficient oxygen reaches plant roots.
- Increased Nutrient Availability: Loosened soil allows roots to access essential nutrients.
- Improved Root Growth: Loosening soil is vital for extensive root systems.
- Reduced Compaction: Loosening combats soil compaction from various causes.
Good drainage is vital for plant health. Excess water can suffocate roots, leading to diseases and plant decline. Loosening soil enhances drainage by creating channels for water to move through. Different soil types will hold water in various amounts. For example, clay soil holds much more water than sandy soil. When the soil is well-draining, excess water flows away, and the roots receive the right amount of moisture. This protects the plants from waterlogging and helps them grow better.
Just like we need air to breathe, plant roots require oxygen to function properly. When soil is compacted, the spaces between soil particles collapse, reducing oxygen levels. This inhibits root growth and reduces nutrient absorption. By loosening the soil, you create air pockets that allow oxygen to circulate freely to the roots. Proper aeration encourages healthy root development, improves nutrient uptake, and boosts overall plant vigor, leading to stronger, more resilient plants.
The roots of your plants are like their mouths, absorbing the nutrients they need to grow. When the soil is compacted, roots have difficulty spreading out to find food. Loosening the soil creates space for the roots to grow and seek out these essential elements. Furthermore, a well-aerated soil promotes the activity of beneficial microbes that break down organic matter and release nutrients. The result is better nutrient absorption, which means healthier, more productive plants.
Healthy root systems are the backbone of thriving plants. They anchor the plant, absorb water and nutrients, and help the plant stand strong. Compacted soil restricts root growth, making it harder for roots to expand and develop. Loosening the soil gives roots the freedom to spread out, allowing them to establish a strong base. The roots can easily reach for water and nourishment. The result is more resilient plants that can withstand stresses and thrive in your garden.
Soil compaction can result from several factors, including heavy foot traffic, constant use of heavy machinery, or even the natural settling of the soil over time. This compaction reduces the space between soil particles, making it challenging for water, air, and plant roots to penetrate. Loosening the soil counteracts the negative effects of compaction. By breaking up the compacted layers, you restore the soil’s structure, allowing it to function properly. This ensures that the plants receive the resources they need to grow strong and healthy.
The Impact of Soil Type on Soil Health
Understanding your soil type is key to choosing the correct gardening tools to loosen soil. Different soils require different approaches. For instance, clay soil, known for its density, needs a more robust approach than sandy soil, which drains quickly but can lack nutrients. Testing your soil, or simply observing its texture and behavior, will help you determine the best strategies for soil care. Soil testing kits are available at most garden centers. Knowing your soil will make a world of difference in your success.
- Clay Soil: This type of soil is often dense, requiring tools that can break up compacted layers.
- Sandy Soil: Sandy soil drains quickly but may lack nutrients, so it benefits from amending with organic matter.
- Silty Soil: This type of soil feels smooth and is often fertile, but it can compact easily.
- Loamy Soil: This is considered the ideal soil. It’s a mixture of sand, silt, and clay, offering good drainage, aeration, and fertility.
Clay soil is easily recognizable by its stickiness when wet. It has very fine particles, leading to poor drainage and aeration. When clay soil dries, it hardens, making it difficult for roots to penetrate. Working with clay soil usually involves turning it over, adding organic matter, and using tools designed to break up its structure. The goal is to improve drainage and aeration while creating a more hospitable environment for plant roots to grow. A broadfork is a good tool for clay soil.
Sandy soil is made up of larger particles that drain quickly. While this provides excellent drainage, it can also mean that the soil dries out quickly. Sandy soil often has poor nutrient retention. When working with sandy soil, the goal is often to improve its ability to hold water and nutrients. You’ll want to add organic matter like compost, which increases the soil’s water-holding capacity and improves its fertility. This will create a better environment for plant growth.
Silty soil has particles that are medium-sized. Silty soil often feels smooth to the touch, and it usually retains water and nutrients well. Silty soil can be prone to compaction, so it’s essential to monitor it and address any compaction issues promptly. A garden fork is an excellent choice for loosening silty soil because it allows for easy aeration without disturbing the soil’s natural structure. Careful attention to these factors will help maintain its fertility and support healthy plant growth.
Loamy soil is known as the perfect soil for gardening. It is a balanced blend of sand, silt, and clay. Loamy soil has excellent drainage and aeration. It holds water and nutrients, which creates an ideal environment for plant growth. Loamy soil is rich in organic matter, making it fertile and providing a good base for plant roots to establish themselves. Maintaining a loamy soil is often about adding organic matter and not compacting the soil. This soil type is the easiest to work with.
Essential Gardening Tools to Loosen Soil
Choosing the correct tools can make all the difference in your gardening tasks. From simple hand tools to more advanced designs, there’s a tool for every job. Knowing how to use these tools safely and effectively is vital to improving soil quality. You’ll gain a deeper appreciation for the tools that keep your garden flourishing. Consider the tools to suit your needs. You can choose from small handheld to large equipment.
Hand Tools for Soil Preparation
Hand tools are perfect for smaller gardens, raised beds, or detailed work. They offer precision and control, allowing you to work the soil without disturbing adjacent plants or structures. These tools are often lightweight and easy to manage, making them an excellent choice for gardeners of all experience levels. With proper use, you can improve soil structure and prepare the planting beds. You can get a good workout while you are doing it.
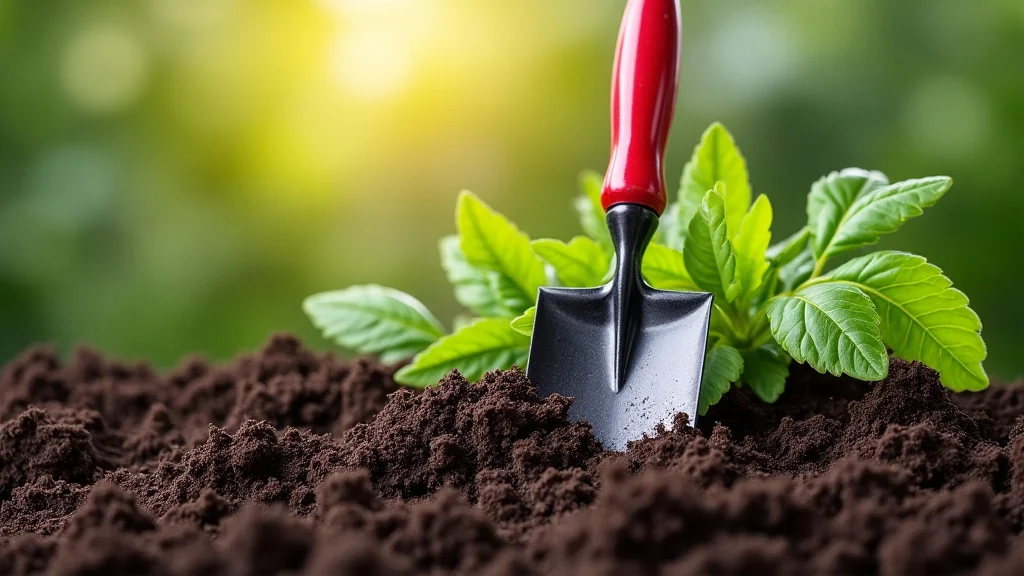
- Trowel: A versatile tool for digging small holes and planting seedlings.
- Hand Fork: Useful for breaking up small clumps and mixing in soil amendments.
- Weeder: Gets rid of weeds with precision.
- Hand Cultivator: Used to break up the top layer of soil and remove small weeds.
A trowel is a simple but essential tool for any gardener. It’s a small, hand-held tool typically made of metal or plastic. The trowel is excellent for a variety of tasks, including digging small holes for planting seedlings, transplanting small plants, and mixing in soil amendments. Because it’s small, it’s easy to maneuver around established plants. The shape of the trowel also lets you dig into the ground at an angle. This makes it easier to dig deeper or move soil.
A hand fork is another useful tool for gardeners. Usually made of metal with several tines, it’s designed to break up compacted soil and mix in amendments like compost or fertilizer. Its size and shape make it easier to work in tight spaces, such as raised beds or between plants. This tool is valuable for aerating the soil, providing better drainage, and improving the overall quality of the soil for plant growth. Because it’s small, it is easy to control and maneuver.
A weeder, as the name suggests, is a tool for removing weeds. It’s usually small and designed to get under the roots of weeds, helping to remove them entirely from the soil. Weeders come in different shapes and designs. Some have a long handle for standing while weeding, while others are handheld for more close-up work. Weeding regularly with these tools can prevent weeds from taking over your garden. The weeder is a gardener’s best friend.
A hand cultivator is a small tool with several tines used to break up the top layer of soil. It’s great for aerating the soil and creating a fine texture. This action helps to remove small weeds and prepare the soil for planting. Hand cultivators can be easy to use and effective for maintaining the soil surface. They also aid in making the soil more receptive to watering. They are simple to use. Many models offer a comfortable grip and lightweight design.
Large Tools for Extensive Soil Work
For larger areas or more extensive soil preparation, these larger tools are essential. They offer greater efficiency and power, making the job easier and faster. These tools are usually more robust and designed to handle larger volumes of soil. They’re valuable for preparing new beds, turning over large areas of soil, and managing soil conditions in larger gardens. They’re a long-term investment that brings great rewards.
- Garden Fork: Ideal for turning soil, breaking up clumps, and aerating the soil.
- Spade: Used for digging, turning soil, and edging beds.
- Broadfork: A powerful tool for aerating and loosening soil without inverting it.
- Rototiller: A power tool for tilling and breaking up soil.
A garden fork is a versatile tool for various soil preparation tasks. It’s generally a long-handled tool with several sturdy tines. It is perfect for turning over soil, breaking up clumps, and aerating. The fork can also be used to mix in soil amendments, such as compost or manure. When choosing a garden fork, consider the size of your garden and the type of soil you have. A long handle will help you to reach deep into the soil without bending. The tines should be strong enough to withstand heavy use.
A spade is a flat-bladed tool with a long handle, designed for digging, turning soil, and edging garden beds. The spade’s flat blade makes it suitable for cutting through roots, while the angle of the blade allows for easy lifting and moving of soil. Spades are perfect for preparing planting beds, transplanting plants, and shaping borders. The size and shape of a spade can vary, so consider the tasks you will be performing when selecting one.
The broadfork, also called a U-fork, is designed for the serious gardener. It’s a large tool with a set of long tines and two handles. You can use it to aerate and loosen soil deeply, without inverting the soil layers. This helps preserve the soil structure and beneficial organisms. To use a broadfork, insert the tines into the ground, and step on the crossbar to drive the tines into the soil. Then, rock the tool back and forth to loosen the soil. Broadforks are beneficial for preparing beds and improving soil structure.
The rototiller, or tiller, is a motorized tool designed to till, or cultivate, soil. It can break up compacted soil, chop up organic matter, and prepare the soil for planting. Rototillers come in various sizes, from small, electric models for raised beds to large gas-powered machines for expansive gardens. Rototillers offer significant time savings compared to hand tools, making them an excellent choice for large-scale gardening. Ensure the soil is moist but not soaking. They will improve aeration and drainage, which will benefit your plants.
Choosing the Right Tool for the Job
Picking the correct tool depends on your garden’s size, the type of soil, and the task at hand. Hand tools are ideal for smaller plots and detailed work, while larger tools are more efficient for extensive areas. Understanding your soil type is key. Consider whether your soil is sandy, clay, or loamy. This will guide your tool choices. For example, clay soil might need a broadfork, while sandy soil might benefit from a garden fork.
- Assess the Garden Area: Decide if you need hand tools or large equipment.
- Analyze Your Soil Type: Clay, sand, silt, or loam will determine the appropriate tools.
- Consider the Task: Aerating, digging, or turning soil requires different tools.
- Evaluate Your Budget: Weigh the cost of each tool against your gardening needs.
Start by considering the size of your garden. Smaller gardens, raised beds, or container gardens can benefit from hand tools. These tools are maneuverable and offer precision. Larger areas, such as vegetable gardens or flower beds, may call for larger tools to prepare the soil and get the work done more efficiently. Rototillers and broadforks can make soil preparation fast and easy. The assessment will save time and energy, and it helps you get the right tool.
Identifying your soil type is critical to choosing the correct tools. Clay soil is dense and requires tools designed to break up its structure, such as a broadfork or a garden fork. Sandy soil drains quickly, and tools that help retain moisture and incorporate organic matter may be helpful. Loamy soil, considered ideal, may still benefit from occasional aeration with a garden fork. Understanding your soil type makes your gardening tasks much more effective. Soil testing can provide a good idea of what type of soil you have.
The task at hand also influences your tool selection. If you need to aerate the soil, a garden fork or broadfork is an excellent option. For digging holes for planting, a trowel or spade is suitable. Turning over soil and incorporating amendments might require a garden fork or a rototiller. Select the right tool for the job to ensure efficiency and protect the plants. The right tool also improves the quality of your soil.
The cost of gardening tools can vary greatly. Hand tools are typically more affordable, while power tools such as rototillers can represent a more significant investment. Evaluate your budget and consider how frequently you will use each tool. If you have a small garden and only need to loosen soil occasionally, hand tools might be sufficient. If you have a large garden or plan to do a lot of gardening, the initial investment may be worth the ease and efficiency. Consider tool rental options if you only need the tool once.
Best Practices for Using Gardening Tools to Loosen Soil
Mastering the correct techniques for using gardening tools to loosen soil can greatly improve their effectiveness. Improper techniques can cause problems, such as compacting the soil further or damaging plant roots. With practice, you’ll be able to work the soil efficiently. Proper form will reduce fatigue and minimize strain, allowing you to enjoy your gardening activities more. The following instructions will help you.
Using Hand Tools Effectively
Using hand tools correctly can make a big difference in how well the soil is prepared. With hand tools, start by loosening the top few inches of soil. Work gently, being careful not to harm the roots of existing plants. Use the tools to break up any clumps or compacted areas. Ensure you are getting the full value out of the tool. The results will be healthier soil and more successful gardening.
- Trowel: Use the trowel to dig holes and plant seedlings, avoiding root damage.
- Hand Fork: Use a hand fork for breaking up small clumps of soil and mixing in amendments.
- Weeder: Use the weeder to get under weed roots and pull them out completely.
- Hand Cultivator: Use the hand cultivator to break up the top layer of soil and remove weeds.
When using a trowel, the technique is key. Hold the trowel firmly. Position it at the right angle for digging a hole. When planting seedlings, dig a hole that is large enough to accommodate the roots. Place the seedling into the hole and fill around it with soil. Gently firm the soil around the seedling. Try not to press down too hard, which may compact the soil. Ensure the seedling is at the same depth as it was in its previous container.
A hand fork is useful for breaking up small clumps and mixing in organic matter. Insert the tines of the fork into the soil at a slight angle. Gently twist and pull back to break up any compacted areas. Use the fork to mix in compost, manure, or other soil amendments. Work carefully around established plants to avoid damaging their roots. Go deep into the soil. With a gentle turning motion, the soil will be broken up, aerated, and ready for planting.
A weeder is an effective tool for removing weeds, and removing them correctly is very important. Position the weeder so that the blade is as close to the ground as possible. Insert the blade of the weeder under the root system of the weed. Gently pry the weed up, ensuring that you get the entire root. Remove the weed and its root. Continue this method to remove weeds, keeping your garden looking neat and tidy. Regular weeding will help to prevent future growth.
Using a hand cultivator is a great way to aerate the soil and prepare it for planting. Hold the tool firmly. Insert the tines into the soil to a shallow depth. Use a back-and-forth motion to break up the top layer of the soil. This movement helps to remove small weeds and create a fine texture for planting. Work the tool slowly and deliberately. This also helps to prevent weeds from returning. A hand cultivator is an excellent tool for maintaining soil health.
Techniques for Large Tools
Working with larger tools requires greater care. Whether you are using a garden fork, spade, or rototiller, it’s essential to follow best practices. Safety is also vital. You can protect yourself and your plants while ensuring the soil is prepared to receive your next planting. Consider safety and the steps needed to obtain a good result.
- Garden Fork: Insert the tines and rock the fork back and forth to loosen soil without inverting.
- Spade: Use a spade to dig, turn, and edge beds, taking care not to strain your back.
- Broadfork: Step on the crossbar and rock the tool to deeply loosen soil, avoiding soil inversion.
- Rototiller: Use a rototiller, following the manufacturer’s instructions.
To use a garden fork effectively, begin by inserting the tines into the soil. Step on the crossbar to drive the tines into the ground. Then, gently rock the fork back and forth. This motion loosens the soil and helps to aerate the soil. Avoid inverting the soil layers. This can disrupt the natural structure and the beneficial organisms within. Work carefully to avoid damaging roots and be mindful of any underground utilities. A garden fork creates an ideal soil environment.
When using a spade, stand with your feet shoulder-width apart. Hold the spade firmly and insert the blade into the soil at an angle. Use your leg muscles to drive the spade into the soil. Lift the soil and turn it over. Take care not to strain your back. Bend at your knees, not at your waist. To edge beds, use the spade to create a neat, clean border. This will help define the garden beds and give them a professional look.
Using a broadfork allows you to deeply loosen the soil. Start by inserting the tines into the ground. Place one foot on each of the handles and step on the crossbar to drive the tines into the soil. Then, gently rock the tool back and forth to loosen the soil without inverting it. This technique helps preserve the soil structure and minimizes disruption of the soil’s natural layers. Remove the broadfork. Repeat this action to aerate the entire area, readying the soil for plants.
To use a rototiller safely and effectively, read and follow the manufacturer’s instructions. Always wear safety glasses and hearing protection. Start the tiller in an open area. Slowly guide the machine across the soil. Overlap each pass to ensure complete coverage. Make sure the soil is slightly moist. Avoid tilling when the soil is too wet, as this can compact the soil. By following these steps, you can prepare your soil for planting. Regular maintenance will prolong the life of your equipment.
Safety and Maintenance Tips
Safety is key when working with any gardening tool. Wear the right protective gear, such as gloves and safety glasses, to shield yourself. Maintaining your tools can extend their life and improve their performance. Regularly clean and sharpen the blades of cutting tools and store them in a dry place. Proper maintenance will protect your investment.
- Wear Protective Gear: Wear gloves, safety glasses, and sturdy shoes while gardening.
- Keep Blades Sharp: Sharpen blades regularly for efficient and safe use.
- Clean and Store Tools Properly: Clean tools after each use and store them in a dry place.
- Inspect Tools Regularly: Check for damage and repair or replace worn parts.
Safety should always be a top priority in the garden. Protective gear, such as gloves, safety glasses, and sturdy shoes, can help you avoid injuries. Gloves will protect your hands from blisters. They also shield them from cuts and thorns. Safety glasses will protect your eyes from flying debris. Sturdy shoes will give you better traction and protect your feet. Wearing the right gear will give you peace of mind.
Sharp blades make it much easier to cut through soil and plants. They require less force and minimize the risk of accidents. Use a file or sharpening tool to keep your blades sharp. Sharpen your tools on a regular schedule, especially after frequent use. Regularly sharpen your tools to help keep you safe. Dull blades can lead to injury. Make sure you know how to safely sharpen your tools. Properly sharpened tools also require less effort to use.
Cleaning your tools after each use helps to remove dirt, mud, and plant debris. This process prevents rust and corrosion. Wipe down the tools with a damp cloth or brush. For metal tools, apply a light coat of oil to prevent rust. Store your tools in a dry place, such as a shed or garage. Proper storage will extend the life of your tools and help them to perform better. Cleaning and storing your tools will also make them ready for use when you need them.
Inspect your gardening tools regularly to look for any signs of damage. Check for cracks, loose handles, or any other issues that could affect performance. Repair or replace any worn or damaged parts promptly. Regular inspection and maintenance can prevent accidents. It also extends the lifespan of your tools. By addressing small issues quickly, you can prevent them from becoming larger problems. A well-maintained toolkit is crucial for any gardener.
Frequently Asked Questions
Question: How often should I loosen my soil?
Answer: Loosen your soil at least once a year, preferably in the spring before planting. You may need to loosen it more frequently in areas with heavy foot traffic or clay soil.
Question: What’s the best tool for loosening compacted clay soil?
Answer: A broadfork is an excellent choice for clay soil, as it can loosen the soil deeply without inverting it. A garden fork is another effective option.
Question: Can I loosen soil without harming plant roots?
Answer: Yes, by using hand tools carefully and being aware of root locations. Always work gently and avoid digging too close to established plants.
Question: What’s the best way to improve drainage in my garden?
Answer: Loosening the soil is a primary step, along with adding organic matter like compost or aged manure. This will improve both drainage and aeration.
Question: Is it necessary to wear gloves when using gardening tools?
Answer: Yes, gloves protect your hands from blisters, cuts, and dirt. They also provide a better grip on the tools, improving safety and efficiency.
Final Thoughts
Improving the health of your soil is a foundational step in creating a thriving garden. By selecting the correct gardening tools to loosen soil and using them correctly, you’re not just preparing the ground for planting; you’re building a foundation for healthy growth and a bountiful harvest. Whether you’re working with a small urban garden or a sprawling plot, the right tools will make the task easier and more effective. Remember to consider your soil type and garden size to guide your choices. Incorporate these practices into your regular gardening routine. Your plants will surely appreciate the effort. Prepare to enjoy a healthier and more productive garden.